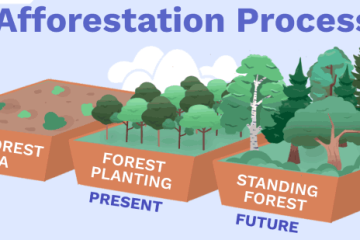
Innovated and pioneered by Japanese botanist Akira Miyawaki, the Miyawaki technique is an effective, smart, and a sustainable way to build native, dense forests. What makes this renowned method so efficacious is its ability to ensure 10x faster plant growth and a plantation that is 30x denser than the traditional methods of growing forests.
The secret to achieving these incredible results lies in planting dozens of native species close to each other. This leads to the growth of a forest that can become maintenance-free after the first two years!
Let us dive deeper and look at the basic steps to create such forests in small urban areas.
Step 1: Know the Texture of Your Soil
Understanding the texture of your soil helps determine its capacity for holding water, the capacity of root perforation, water infiltration, and retention of nutrients. Carry out a ribbon test to find out what type of particles your soil contains. Notice if the soil texture is clayey, sandy, or loamy.
Loamy soils are preferable as it contains a mixture of sand, clay, silt, and organic matter. They also provide the right balance of oxygen, water, nutrients, and drainage for the forest to blossom.
Ingredients for the Soil
● Adding perforator materials such as wheat, groundnut shells, corn husk, rice husk will significantly improve perforation and help the roots to grow.
● Next, add water retainers to help the soil retain water and moisture. Materials such as sugarcane stalk and cocopeat are great options.
● For the soil to receive nutrition, organic fertilizers such as vermicompost, cow manure can be used.
● The final step would be to add a layer of mulch as it protects and insulates the soil. It also prevents sun rays to fall directly on the soil and ensures that the water in the soil does not evaporate. Some excellent options are dried grass, dried leaves, barley stalk, wheat stalk, rice straw, and corn stalk.
Step 2: Choose Different Species of Trees for Plantation
Aim for planting a variety of native species to promote biodiversity. Native species also require less long-term maintenance and are more likely to survive and thrive in the local environmental conditions. What’s more, they provide an ideal home for endangered species.
● Identify the type of native species, its advantages, and the maximum height they reach. Check the availability of the species in the nursery and their age. An ideal height to consider is around 60-80 cms. Opt for a mix of flowering, medicinal, timber, and fruiting species.
● Choose 5 types of species to be the major species in the forest. They will constitute around 50% of the forest.
● Choose supporting native species that will constitute 25-40% of the forest. Minor native species will make up for the remaining parts of the forest.
Step 3: Time to Design Your Afforestation Area
● Identify an appropriate area for afforestation and procure the materials to start executing the project.
● Design a water pipeline layout with the help of an architect. Ensure that it is backed by overhead tanks and borewells. This is because the forest needs to watered daily for the first 3 years.
● Identify spaces for the site office, storing equipment, saplings, and a laborer’s resting area. If your project is large, your afforestation area must have access to trucks, vehicles, and earthmovers.
Step 4: Start Planting the Trees
● Outline the area you want to plant with chalk powder.
● Within the area of planting, draw out the plantation bed area and sperate the service area.
● Excavate the soil for about 3-4 feet and keep the excavated soil on the side.
● Mix the perforators, organic fertilizers, and water retainers, without any clumps. Ensure that they are mixed in the same ratios for each mound.
● Push back the mixed soil to fill the land. Ensure that the land is not compressed or walked upon. The idea is to leave the soil aerated and loose.
● Level the soil with hand tools.
● Mark the leveled soil with chalked powder for creating pits every 1.5-2 feet, in a triangular formation.
● Dig pits that are 12 inches wide and 12 inches deep.
● Place the saplings depending on the number of varieties you have and how your grid is created. For instance, if you have 30 species of trees, then mark the grid based on 30 pits.
● Before removing the saplings from their bags, dip the bags in a bucket that is filled with 20 part water, and 1 part Jeeva Amrut, or gaumutra, or coffee mix. Ensure that all the bubbles are settled before removing the sapling bags.
● Remove the sapling from the bag, place it in the pit, and loosely cover it with soil.
● Try not to plant two similar species next to each other and don’t follow any pattern while planting. Maintain a 60cm distance between each sapling.
● After planting the saplings, insert 4-5 feet of bamboo sticks into the soil, close to the plant. These support sticks will ensure the saplings don’t bend or droop during the first few months.
● Add a 5-7 inch layer of mulch in the soil. Consider at least half a kilo of mulch per tree. Tie it down with jute ropes to ensure the mulch doesn’t fly around during strong winds. Tie the ropes on bamboo pegs that are nailed at the forest periphery. This will ensure that the rope is pressed down on the mulch.
● For the first time, the trees must be watered for an hour to make sure the mulching and the soil settle.
Step 5: How to Care for the Forest
● Level the soil with hand tools.
● Mark the leveled soil with chalked powder for creating pits every 1.5-2 feet, in a triangular formation.
● Dig pits that are 12 inches wide and 12 inches deep.
● Place the saplings depending on the number of varieties you have and how your grid is created. For instance, if you have 30 species of trees, then mark the grid based on 30 pits.
● Before removing the saplings from their bags, dip the bags in a bucket that is filled with 20 part water, and 1 part Jeeva Amrut, or gaumutra, or coffee mix. Ensure that all the bubbles are settled before removing the sapling bags.
● Remove the sapling from the bag, place it in the pit, and loosely cover it with soil.
● Try not to plant two similar species next to each other and don’t follow any pattern while planting. Maintain a 60cm distance between each sapling.
● After planting the saplings, insert 4-5 feet of bamboo sticks into the soil, close to the plant. These support sticks will ensure the saplings don’t bend or droop during the first few months.
● Add a 5-7 inch layer of mulch in the soil. Consider at least half a kilo of mulch per tree. Tie it down with jute ropes to ensure the mulch doesn’t fly around during strong winds. Tie the ropes on bamboo pegs that are nailed at the forest periphery. This will ensure that the rope is pressed down on the mulch.
● For the first time, the trees must be watered for an hour to make sure the mulching and the soil settle.
Conclusion:
After following all the above-mentioned steps, you should have a dense and thriving forest in your hands in a few years. We hope this article has inspired you to grow your forest. Please feel free to share this information with others so that the biodiversity can be restored and our ecological footprint is reduced.
If you are looking for experts to help you with your forest planting initiative, then get in touch with us. We at Forest Creators, specialize in developing forests using the renowned Miyawaki method. With this smart and effective technique, we initiate the development of fast-growing, self-sustaining, and 100% organic forests, irrespective of factors such as climate and soil.


